Amazon Translate w/ ELK and Skedler: Cost-Efficient Multilingual Customer Care
In the previous post, we presented a system architecture to translate text from multiple languages with AWS Translate, index this information in Elasticsearch 6.2.3 for fast search, visualize the data with Kibana, and automated sending of customized intelligence with Skedler Reports and Alerts.
In this post, we are going to see how to implement the previously described architecture.
The main steps are:
- Define API Gateway HTTP endpoints
- Build a AWS Lambda Function
- Deploy to AWS with Serverless framework
- Translate text with AWS Translate
- Index to Elasticsearch 6.2.3
- Search in Elasticsearch by language – full-text search
- Visualize, report and monitor with Kibana dashboards
- Use Skedler Reports and Alerts for reporting, monitoring and alerting
We are going to define two HTTP API methods, one to translate and index new inquiries and another one to search for them. We will use AWS API Gateway, a fully managed service that makes it easy for developers to create, publish, maintain, monitor, and secure APIs at any scale.
The core of our solution will receive the inquiry (as a string) to be translated, translate it and index the text with the translations to Elasticsearch.
We will use AWS Lambda. It lets you run code without provisioning or managing servers. You pay only for the compute time you consume – there is no charge when your code is not running. With Lambda, you can run code for virtually any type of application or backend service – all with zero administration. Just upload your code and Lambda takes care of everything required to run and scale your code with high availability. You can set up your code to automatically trigger from other AWS services or call it directly from any web or mobile app.
To deploy our AWS Lambda function and the API Gateway HTTP endpoints, we will use the Serverless Framework. Serverless is a toolkit for deploying and operating serverless architectures.
1. API Gateway
We are going to configure the following HTTP enpoints:
- HTTP POST /createTicket
- HTTP GET /searchTicket
The createTicket endpoint will be used to translate the text using AWS Translate and to index the document in Elasticsearch. The searchTicket endpoint will be used to search for documents in different languages. The handler for each endpoint will be an AWS Lambda function.
Below is the serverless.yml section where we have defined the two endpoints.
functions:
create:
handler: handler.create_ticket
events:
– http:
path: createTicket
method: post
search:
handler: handler.search_ticket
events:
– http:
path: searchTicket
method: get
2. AWS Lambda
Once we have defined the two endpoints, we need to write the Lambda function. We do not focus on the deploy of the function in AWS, the Serverless framework will take care of it. The function we are going to write will perform the following:
- Get the input that need be translated (the customer inquiry)
- Invoke AWS Translate and get the translations of the input
- Create the Elasticsearch document
- Index the document
def create_ticket(event, context):
body = json.loads(event[‘body’])
text = body[‘text’]
customer_code = body[‘customerCode’]
country = body[‘country’]
Detect the language of the input text
translate_client = boto3.client(‘translate’)
comprehend_client = boto3.client(‘comprehend’)
def create_ticket(event, context):
body = json.loads(event[‘body’])
text = body[‘text’]
customer_code = body[‘customerCode’]
country = body[‘country’]
target_languages = os.environ[‘AWS_TRANSLATE_SUPPORTED_LANGUAGES’].split()
dominant_language = comprehend_client.detect_dominant_language(
Text=text
)[‘Languages’][0][‘LanguageCode’]
and invoke AWS Translation
translate_client = boto3.client(‘translate’)
def get_translation(text, source_dominant_language, target_dominant_language):
return translate_client.translate_text(
Text=text,
SourceLanguageCode=source_dominant_language,
TargetLanguageCode=target_dominant_language
)[‘TranslatedText’]
Create the JSON document and index it to Elasticsearch:
es = Elasticsearch(
[os.environ[‘ELASTICSEARCH_HOST’]],
verify_certs=False
)
def index_new_document(english_text, translations, customer_code, country):
result_nested_obj = []
for key, value in translations.items():
result_nested_obj.append({“language”:key, “text”:value})
doc = {
“text” : english_text,
“language” : ‘en’,
“translations” : result_nested_obj,
“timestamp”: datetime.now(),
“customer_code”: customer_code,
“country”: country,
“ticket_number”: str(uuid.uuid4())
}
es.index(index=os.environ[‘ELASTICSEARCH_INDEX_NAME’], doc_type=os.environ[‘ELASTICSEARCH_TYPE_NAME’], body=doc)
As you may have noticed, we used environment variables. They are defined in the serverless.yml configuration file.
provider:
name: aws
runtime: python3.6
region: eu-west-1
memorySize: 1024
timeout: 300
environment:
AWS_TRANSLATE_SUPPORTED_LANGUAGES: ‘ar zh fr de pt es’ # supported AWS Translate languages
ELASTICSEARCH_HOST: ‘https://yourElasticsearchHost’
ELASTICSEARCH_INDEX_NAME: ‘customercare’
ELASTICSEARCH_TYPE_NAME: ‘ticket’
3. Deploy
We are now ready to the deploy our code to AWS.
This is how my serverless.yml looks like:
We specified the provider (AWS), the runtime (Python 3.6), the environment variables, our HTTP endpoints and the AWS Lambda function handlers.
service: awstranslate
provider:
name: aws
runtime: python3.6
region: eu-west-1
memorySize: 1024
timeout: 300
environment:
AWS_TRANSLATE_SUPPORTED_LANGUAGES: ‘ar zh fr de pt es’ # supported AWS Translate languages
ELASTICSEARCH_HOST: ‘https://yourElasticsearchHost’
ELASTICSEARCH_INDEX_NAME: ‘customercare’
ELASTICSEARCH_TYPE_NAME: ‘ticket’
functions:
create:
handler: handler.create_ticket
events:
– http:
path: createTicket
method: post
cors: true
search:
handler: handler.search_ticket
events:
– http:
path: searchTicket
method: get
plugins:
– serverless-python-requirements
custom:
pythonRequirements:
dockerizePip: false
We specified the provider (AWS), the runtime (Python 3.6), the environment variables, our HTTP endpoints and the AWS Lambda function handlers.
Deploy to AWS:
serveless deploy –aws-s3-accelerate
4. Index to Elasticsearch
Given an inquiry, we now have a list of translations. Now, we want to index this information to Elasticsearch 6.2.3.
We create a new index called customercare and a new type called ticket.
The ticket type will have the following properties:
- text: the English text
- language: the language of the text
- country: the country from where we received the inquiry
- ticket number: an ID generated to uniquely identify an inquiry
- timestamp: index time
- translations: list of the translations (text and language)
PUT /customercare
{
“mappings”: {
“ticket”: {
“properties”: {
“text”: { “type”: “text” },
“language”: { “type”: “keyword” },
“country”: { “type”: “keyword” },
“ticket_number”: { “type”: “keyword” },
“timestamp”: {“type”: “date”},
“translations”: {
“type”: “nested”,
“properties”: {
“text”: { “type”: “text” },
“language”: { “type”: “keyword” }
}
}
}
}
}
}
5. Search in Elasticsearch
Now that we indexed the data in Elasticsearch, we can perform some queries to search in a multi-lingual way.
Examples:
Full-text search through translations:
GET customercare/_search
{
“query”: {
“nested”: {
“path”: “translations”,
“query”: {
“match”: {
“translations.text”: “your text”
}
}
}
}
}
Full-text search through English text and translations:
GET customercare/_search
{
“query”: {
“bool”: {
“should”: [
{
“nested”: {
“path”: “translations”,
“query”: {
“match”: {
“translations.text”: “tree”
}
}
}
},
{
“term”: {
“text”: “tree”
}
}
]
}
}
}
Number of inquiries by a customer (full-text search):
GET customercare/_search
{
“aggs”: {
“genres”: {
“terms”: {
“field”: “customerId”
}
}
},
“query”: {
“bool”: {
“should”: [
{
“match”: {
“text”: “tree”
}
}
]
}
}
}
6. Visualize, Report, and Monitor with Kibana dashboards and search
With Kibana you can create a set of visualizations/dashboards to search for inquiries by language and to monitor index metrics (like number of translations or number of translations by customer).
Examples of Kibana dashboards:
Top languages, languages inquiries by customer and geolocation of inquiries: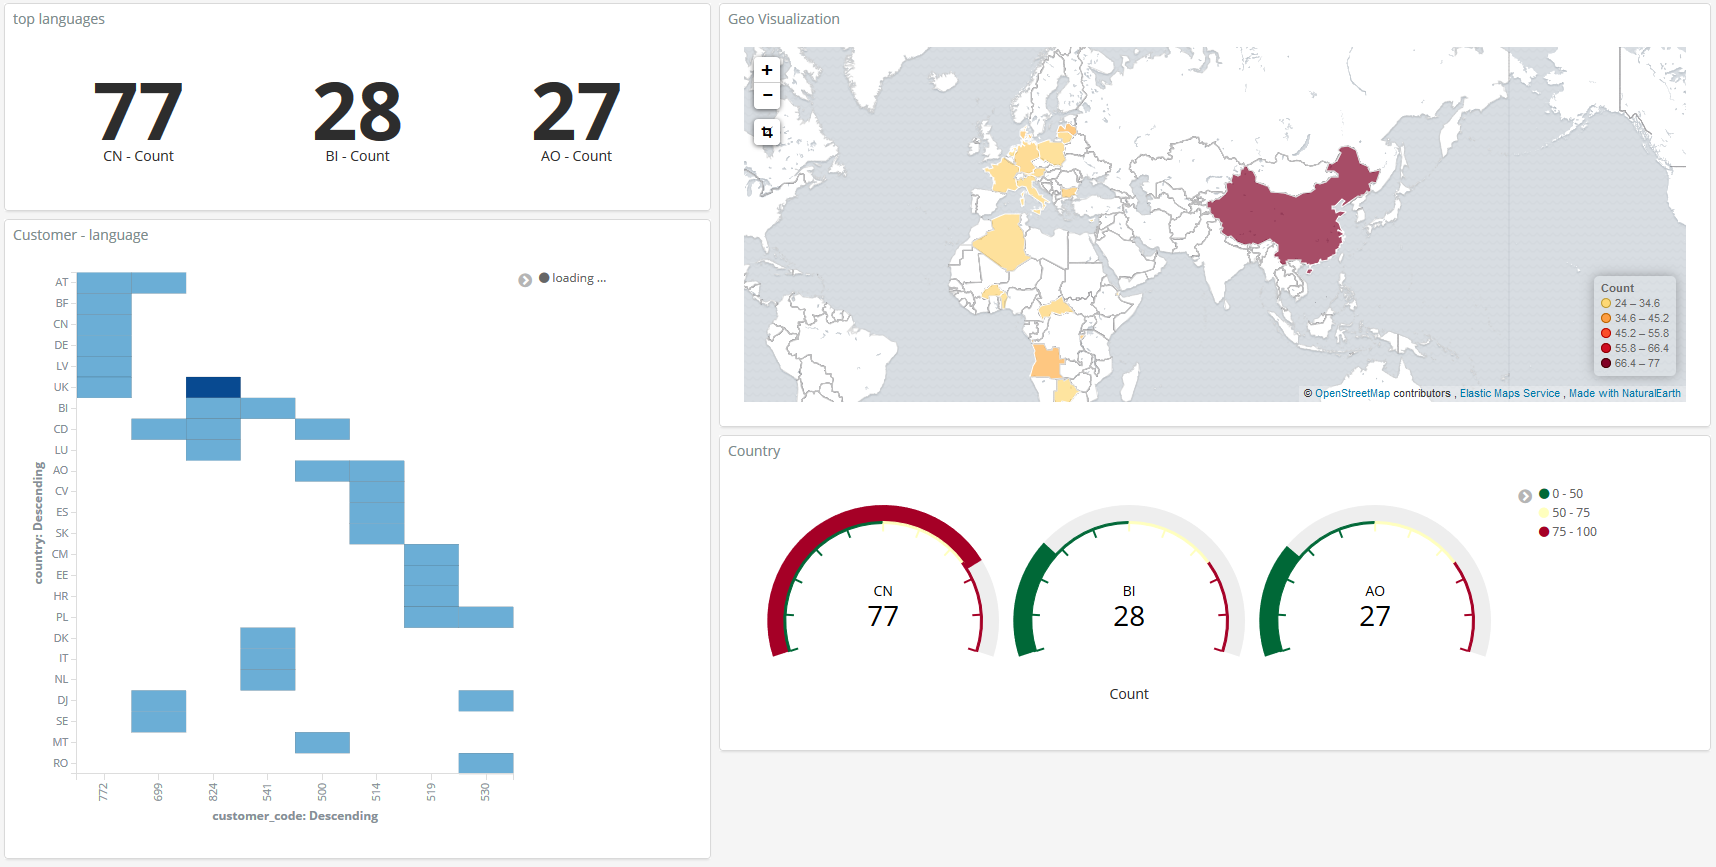
inquiries count by languages and customers and top customer by language:
7. Use Skedler Reports and Alerts to easily monitor data
Using Skedler, an easy to use report scheduling and distribution application for Elasticsearch-Kibana-Grafana, you can centrally schedule and distribute custom reports from Kibana Dashboards and Saved Searches as hourly/daily/weekly/monthly PDF, XLS or PNG reports to various stakeholders. If you want to read more about it: Skedler Overview.
We have created a custom report using Skedler Report Templates that provides an overview of the tickets based on languages and countries of origin. The custom report generated by Skedler is shown below:
[pdfviewer width=”1200px” height=”800px”]https://www.skedler.com/blog/wp-content/uploads/2018/06/Customer-Dashboard_12-06-2018_20-15-00.pdf[/pdfviewer]
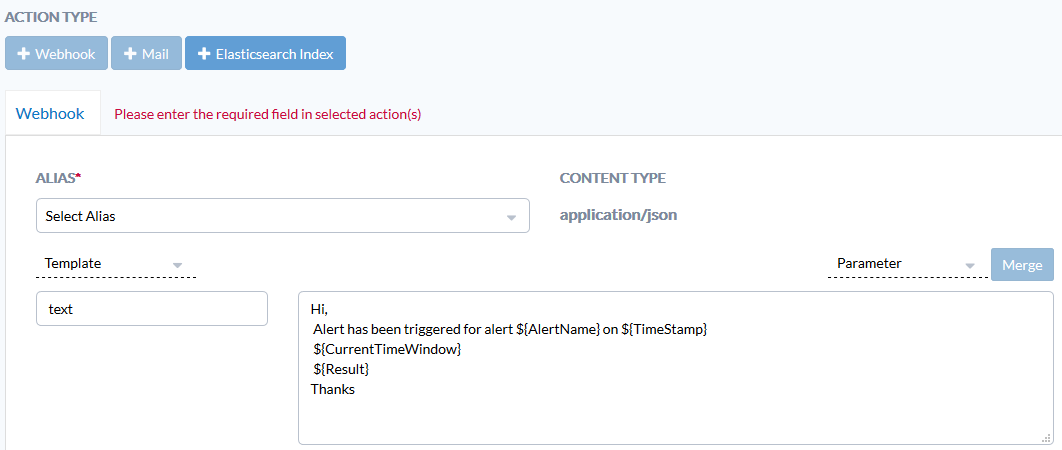
If you want to get notified when something happens in your index, for example, a certain entity is detected or the number of negative feedback by customers crosses a threshold value, you can use Skedler Alerts. It simplifies how you create and manage alert rules for Elasticsearch and it provides a flexible approach to notifications (it supports multiple notifications, from Email to Slack and Webhook).
We have seen how to schedule a report generation. We are now going to see how to use Skedler Alerts to get notified when something happens in our index. For example, if the number of inquiries from a specific country hits a certain threshold.
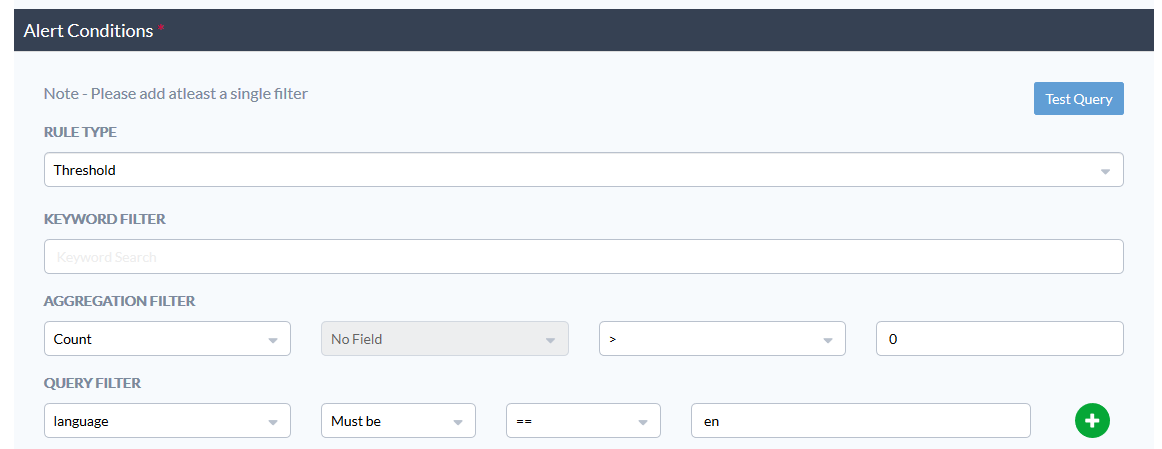
Choose the Alert Condition. For example: “the number of ticket in English must be higher than zero”.
or “the number of ticket in English coming from Italy and containing a given word must be higher than zero”.
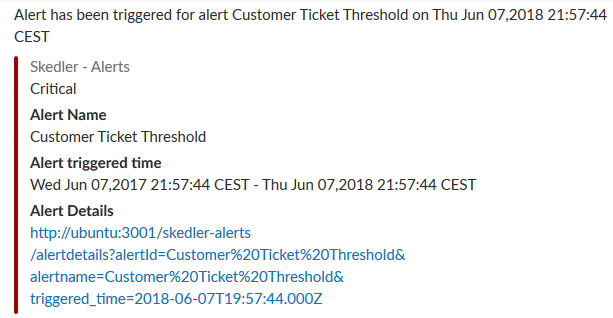
The Skedler Alert notification in Slack looks like.
Conclusion
In this two-part blog series, we learnt how to build our own multi-lingual omni-channel customer care platform using AWS Translate, Elasticsearch, and Skedler. Let us know your thoughts about this approach. Send your comments to hello at skedler dot com.
